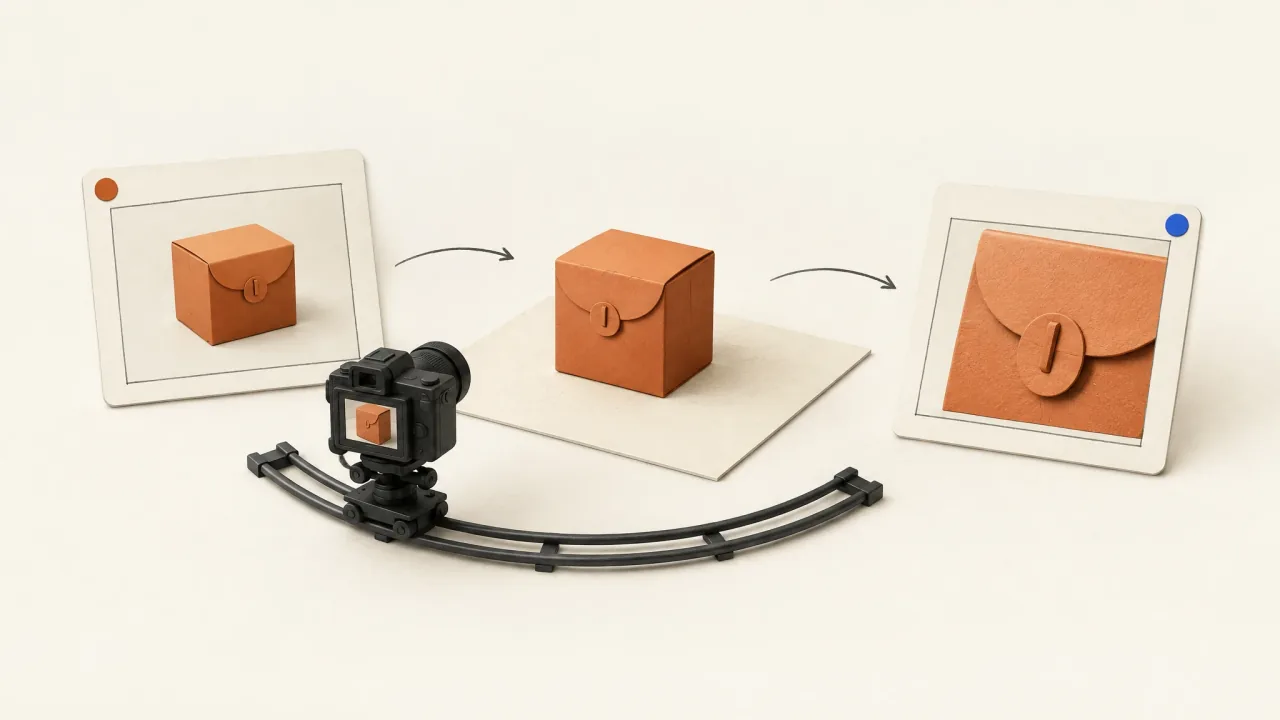
Choose an angle that shows the detail your viewer needs. Add movement if it reveals something a still view can't. A front view can locate a latch; a three-quarter view can explain how that latch relates to the lid. If an orbit hides both, it isn't helping the explanation.
For video, decide where the camera travels and where it stops. A flattering starting view isn't enough. Write down what needs to stay visible during the shot and what someone should be able to inspect at the end.
Name the detail before choosing the angle
Start with a viewing question: “Where is the closure?” is different from “How does the closure open?” The first may need one clear view. The second needs supported product movement, with the contact and opening action visible.
Separate camera movement from product movement. Sliding the viewpoint around a closed package does not demonstrate opening it. Likewise, a moving lid can explain opening while the camera stays still.
Use the product-demonstration shot list to decide which question the sequence should answer. Then choose the camera's position within that shot. Describe the detail it must show in plain language: “The front latch sits below the seated lid edge.”
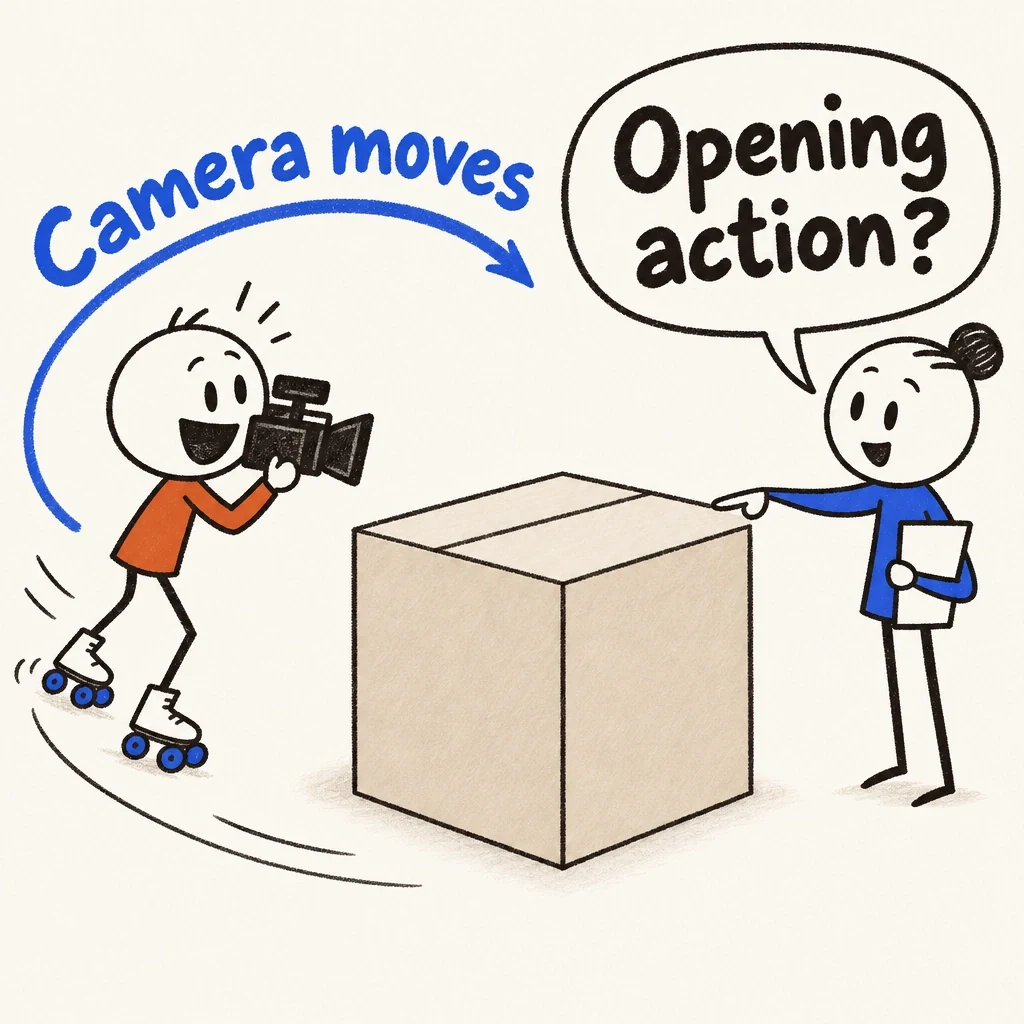
The camera cannot open the box
The camera moves around the closed box. That can show where a closure sits; opening it needs a different action.
View full-size (opens in a new tab)Image explanation
- Choose the question first: where the closure is or how it opens. Request a clear feature view or supported operation with contact and action visible.
- Decide camera movement separately from product movement. A still camera can cover real action, while a moving camera can leave the object closed.
- The paper prop adds no operation or unreferenced surface to the fictional tin.
Match each view to what it exposes and hides
A front view shows the face of a package, the label arrangement, or the position of a front closure. Overlapping edges can leave depth unclear. If the latch blends into the body, changing light or viewpoint may help more than moving closer.
A three-quarter view shows the front and one side together. It can make a lid lip, projecting tab, or container depth easier to understand. Choose the side deliberately, since the opposite side may hide the feature behind an edge.
An overhead view shows an opening's outline, a top layout, or how parts sit beside each other. It can hide a front-facing latch almost completely. Use it when the question concerns the top surface; another angle may show a product detail more clearly.
A detail view enlarges a small relationship. Leave enough surrounding geometry to show where it belongs. A latch filling the entire frame can become an unexplained piece of metal.
Prepare the product views with the reference-image guide. They also set the limits of your camera plan. A front photograph can't establish the design of an unseen rear hinge.
Work through three paths for a package closure
Consider a fictional tea tin with a moss-green rectangular body, cream lid, and small front latch. For this exercise, the supplied mock references show the closed front, front-left three-quarter view, and latch detail. The rear and interior are unspecified. This is an illustrative direction exercise, not a returned Fablo shot.
The viewing question is: where does the latch meet the closed lid? Compare three proposed treatments:
- Locked front view. The latch position is obvious, but the lid lip may appear flat. Choose it if lighting already separates the two parts clearly.
- Short front-to-three-quarter reveal. A shallow sideways move exposes the lid's depth while retaining the front latch. This is the useful motion candidate if the depth relationship needs explanation.
- Full orbit. The camera eventually leaves the latch behind and enters the unreferenced rear view. It adds coverage the brief cannot support and interrupts inspection of the required detail.
For this question, propose the second path, with the first as a simpler alternative. If the actual candidate loses the latch during movement, the locked view may serve the brief better. That is a selection decision, not a claim that either treatment performs better in an ad campaign.
Specify the endpoint before adding cinematic language
The endpoint should complete the viewing question. For the tin, request a front-left three-quarter composition showing the entire latch, the seated lid edge, and enough container body to connect them.
Then define the entry: a slightly more frontal version of that composition. Keep the package closed and stationary. Request a short lateral reveal that stops before the front face becomes unreadable.
“Cinematic orbit” leaves those decisions open. “Reveal the lid lip while preserving the latch, ending on this supplied three-quarter view” gives production a target. Use the external references in the proposed camera-controlled B-roll brief to describe paths and endpoints. The brief doesn't establish that every requested camera control is available or exact.
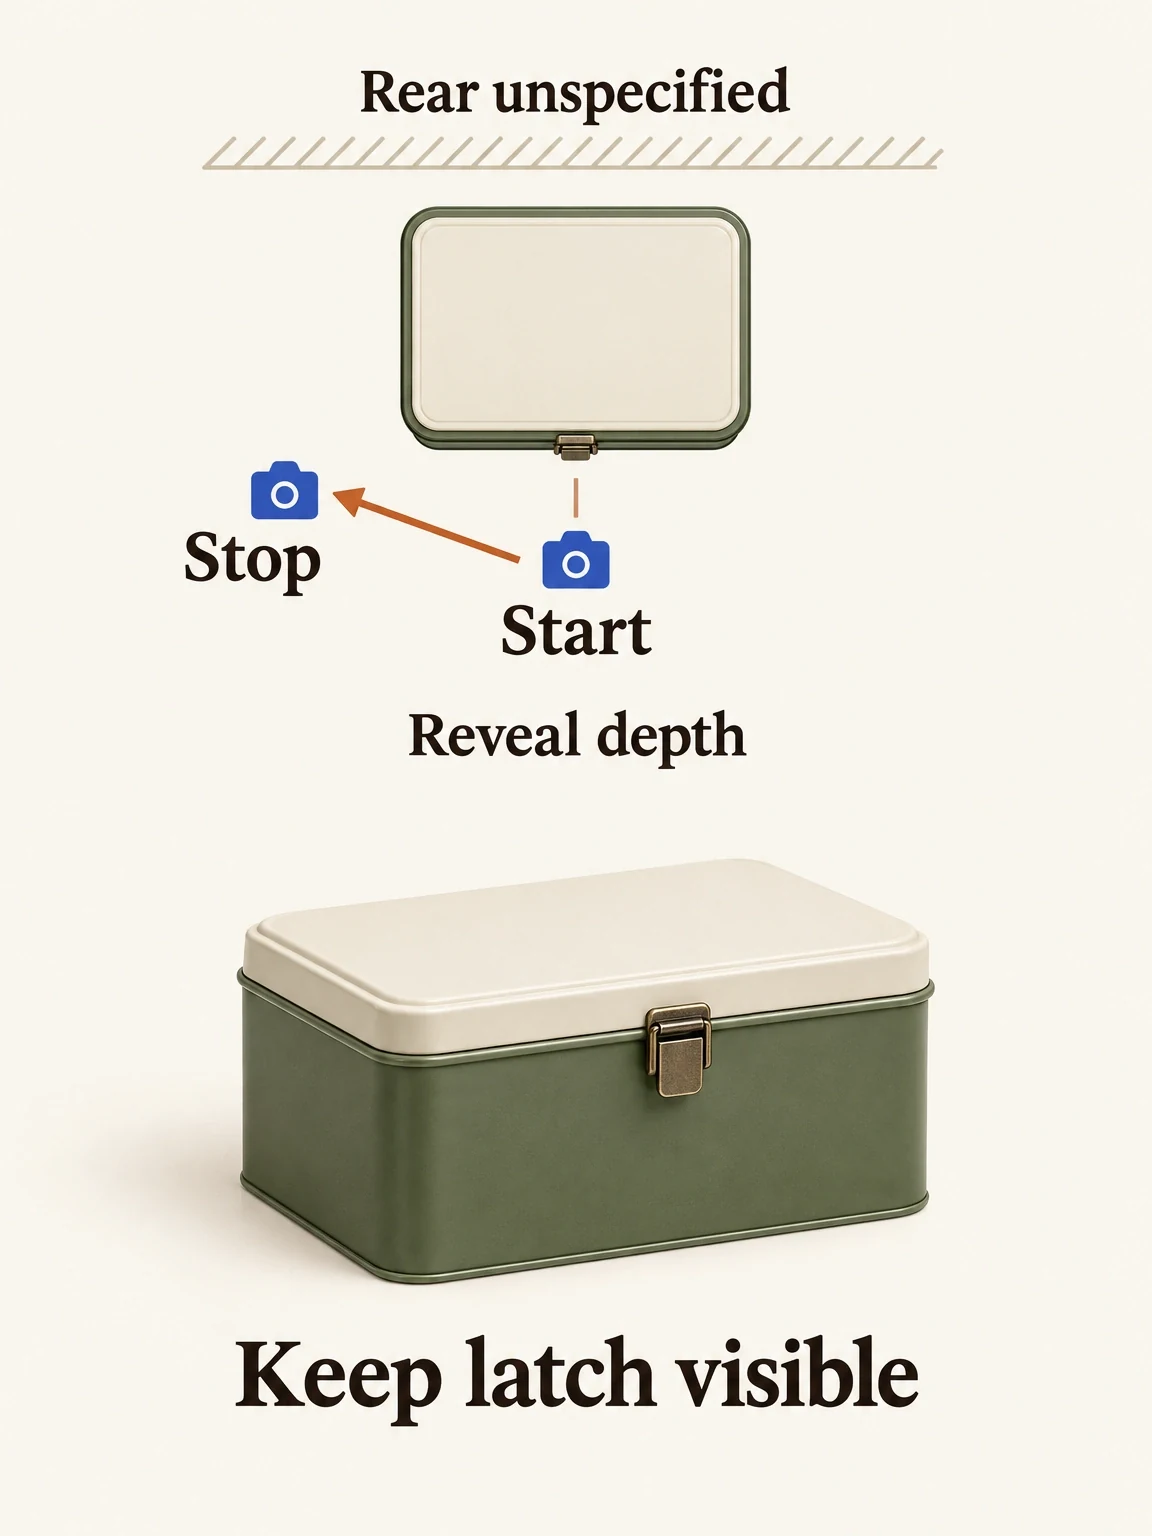
A short reveal with a useful stop
The fictional tin's short reveal shows lid depth while keeping the latch in view. It stops where the references stop.
View full-size (opens in a new tab)Image explanation
- A short near-front-to-front-left reveal keeps the fictional tin's latch visible while showing the seated lid's depth.
- Stop at the referenced endpoint. The rear and interior are unspecified, and locating the closure leaves its opening action undemonstrated.
Copy the camera-path card
Attach the actual reference views and replace the tin details with those of your product.
Viewing question: Where does the front latch meet the closed lid?
Product authority: Attached front, front-left, and latch-detail views.
Entry: Whole closed tin, near-frontal; latch and lid edge visible.
Path: Short sideways reveal toward the referenced front-left view.
Endpoint: Latch, seated lid lip, and container body readable together.
Keep visible: Entire latch and its relationship to the lid edge.
Product movement: None; this shot locates the closure, not its operation.
Framing limit: Do not crop away the body needed to locate the detail.
Unknown surfaces: Rear and interior; do not invent or reveal them.
Alternative: Locked three-quarter view if movement obscures the detail.
Assembly request: Fit this shot into [video purpose, ratio, runtime].
Acceptance: Inspect the required relationship throughout playback.
Inspect the delivered move before expanding coverage
Watch the shot all the way through. Does the required detail stay visible and the package keep its shape? Does the path reveal depth, or merely slide an unchanged image across the screen? At the endpoint, check that you can inspect the detail you requested.
If the view needs a surface your references don't show, obtain another reference or narrow the shot. More descriptive prompting can't supply missing product evidence.
Bring the card into the product-ad workflow and open Fablo to make a finished product video through chat. Review the production plan and estimate before authorizing the work. Select the assembled candidate by whether its camera work explains the required detail. For recurring product coverage, compare the current pricing information with the scope of the videos you want to make.